We now define some important functions of data value. ![]() is the
average first directional derivative of
is the
average first directional derivative of ![]() over all the positions
over all the positions
![]() at which
at which
![]() .
. ![]() is likewise
the average second directional derivative at value
is likewise
the average second directional derivative at value ![]() .
.
![\begin{figure}
\vspace{3pt}
\psfrag{f0pa}[lc]{\hspace{2pt}\raisebox{0pt}{\scaleb...
...
\centering {
\epsfig {file=eps/findgvhv.eps, width=0.9\textwidth}}
\end{figure}](img114.gif) |
Knowing ![]() and
and ![]() for the range of data values, we can
calculate
for the range of data values, we can
calculate ![]() with Equation 5.6. For more robust
results, instead of using just the maximum or minimum of
with Equation 5.6. For more robust
results, instead of using just the maximum or minimum of ![]() , we
can use both8:
, we
can use both8:
Mathematically, we see that ![]() is a local inverse of
is a local inverse of ![]() , since
, since
![]() , and by definition
, and by definition ![]() . Intuitively,
. Intuitively, ![]() implies
which side of the nearest boundary a data value
implies
which side of the nearest boundary a data value ![]() tends to fall.
For values closer to
tends to fall.
For values closer to ![]() , the position
, the position ![]() will be negative;
for values closer to
will be negative;
for values closer to ![]() ,
, ![]() will be positive. At the value
half-way between
will be positive. At the value
half-way between ![]() and
and ![]() ,
, ![]() will be zero, the
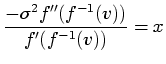
position at the middle of the boundary. In practice, it is useful to
modify Equation 5.9 to account for the fact that due
to low-level measurement noise, the gradient magnitude at the interior
of materials is rarely exactly zero. Knowing how it differs from zero
is a matter of experience, but assuming one can find a scalar quantity
will be zero, the
position at the middle of the boundary. In practice, it is useful to
modify Equation 5.9 to account for the fact that due
to low-level measurement noise, the gradient magnitude at the interior
of materials is rarely exactly zero. Knowing how it differs from zero
is a matter of experience, but assuming one can find a scalar quantity
![]() which is higher than the ambient gradient
magnitude9, Equation 5.9 is re-formulated,
with a slight loss of mathematical accuracy, as
which is higher than the ambient gradient
magnitude9, Equation 5.9 is re-formulated,
with a slight loss of mathematical accuracy, as
To demonstrate the steps involved in the calculation of the position
function ![]() , we consider another synthetic dataset, containing two
concentric spheres with distinct data values.
, we consider another synthetic dataset, containing two
concentric spheres with distinct data values.
![\begin{figure}
\psfrag{VV}[l]{\hspace{4pt}$v$}
\psfrag{PV}[lb]{\raisebox{4pt}{$p...
...
\epsfig {figure=eps/twosph-pplot.eps,
width=0.3\textwidth}}
}
}
\end{figure}](img128.gif) |
Once ![]() is known, it is a relatively simple matter to generate an
opacity function which makes the boundaries of objects visible in the
rendered image. Since the middle of a boundary is always where the
position is zero, we need only make opaque those data values
is known, it is a relatively simple matter to generate an
opacity function which makes the boundaries of objects visible in the
rendered image. Since the middle of a boundary is always where the
position is zero, we need only make opaque those data values ![]() for
which
for
which ![]() is near zero. Exactly how this is done is determined by
the user, who specifies a function
is near zero. Exactly how this is done is determined by
the user, who specifies a function ![]() , which we term the
boundary emphasis function. The function
, which we term the
boundary emphasis function. The function ![]() maps from position
along a boundary to opacity. Since
maps from position
along a boundary to opacity. Since ![]() should be non-zero only
near zero, we have not been especially careful in preventing
should be non-zero only
near zero, we have not been especially careful in preventing ![]() from attaining infinite values due to a low
from attaining infinite values due to a low ![]() ; such a data value
; such a data value
![]() should not contribute to the final image. With
should not contribute to the final image. With ![]() , the user
can directly control the proximity of the rendered boundary to the
object interior, and whether rendered boundaries will appear thick or
thin, sharp or fuzzy. The final opacity function
, the user
can directly control the proximity of the rendered boundary to the
object interior, and whether rendered boundaries will appear thick or
thin, sharp or fuzzy. The final opacity function
![]() is then
defined as
is then
defined as
Figures 5.5 and 5.6 illustrate and
discuss how the choice of the boundary emphasis function affects the
opacity function and the rendered image, using the same concentric
spheres dataset analyzed in Figure 5.4.
Instead of exploring the parameter space of all possible opacity
functions
![]() , the user explores the parameter space of
, the user explores the parameter space of ![]() and lets the information from the histogram volume, embodied in
and lets the information from the histogram volume, embodied in
![]() , constrain the search to those opacity functions which display
object boundaries. Defining opacity as a function of position within
a boundary then becomes a more intuitive task than defining opacity as
a function of data value, as there is a more predictable relationship
between changes made to the boundary emphasis function and the
corresponding change in rendered results.
, constrain the search to those opacity functions which display
object boundaries. Defining opacity as a function of position within
a boundary then becomes a more intuitive task than defining opacity as
a function of data value, as there is a more predictable relationship
between changes made to the boundary emphasis function and the
corresponding change in rendered results.
![\begin{figure}
\setcounter {subfigure}{0} \psfrag{AAbofx}[bl]{\hspace{-3pt}\rais...
...2.high.eps,
width=0.4\columnwidth}\end{tabular}}
\end{tabular*}}
\end{figure}](img134.gif) |
 |
It should be stressed that the user does not set the initial location
of the peaks in
![]() , since this is determined by the information
in
, since this is determined by the information
in ![]() . However the user can modify the location of the
peaks, as well as their width, height, and shape. This is the main
benefit of the method presented in this thesis: if the histogram
volume has successfully captured information about the boundaries in
the dataset, the user enjoys high-level control over the character of
the rendered boundaries without being required to give an exact
specification of
. However the user can modify the location of the
peaks, as well as their width, height, and shape. This is the main
benefit of the method presented in this thesis: if the histogram
volume has successfully captured information about the boundaries in
the dataset, the user enjoys high-level control over the character of
the rendered boundaries without being required to give an exact
specification of
![]() . For instance, the user can specify (as in
Figure 5.5) that the opacity linearly ramp up and
down near the boundary. Unless the user somehow has an intuition for
the position function
. For instance, the user can specify (as in
Figure 5.5) that the opacity linearly ramp up and
down near the boundary. Unless the user somehow has an intuition for
the position function ![]() , it is unlikely that he or she would be
able to manually create the opacity function
, it is unlikely that he or she would be
able to manually create the opacity function
![]() which achieves
this. Furthermore, the
which achieves
this. Furthermore, the
![]() generated by this method is usually
sensible enough that it can be manually edited if desired. For
example, since this technique will attempt to make all
boundaries opaque, a useful supplement to the interface would be a
feature which allows removal of the peaks in
generated by this method is usually
sensible enough that it can be manually edited if desired. For
example, since this technique will attempt to make all
boundaries opaque, a useful supplement to the interface would be a
feature which allows removal of the peaks in
![]() for one or more
boundaries, so as to remove the corresponding boundaries from the
rendering.
for one or more
boundaries, so as to remove the corresponding boundaries from the
rendering.
Even though we have made some strong assumptions about the boundary
characteristics in the volume dataset, the technique described here
typically works well even if the material boundaries are not
``ideal''. Essentially, by taking the quotient of the second and
first derivatives, and by having ![]() assign opacity to positions
around zero, we are more apt to make opaque those data values
associated with both low second derivatives and high first
derivatives, consistent with the criteria usually used in computer
vision edge detectors. Or, even if
assign opacity to positions
around zero, we are more apt to make opaque those data values
associated with both low second derivatives and high first
derivatives, consistent with the criteria usually used in computer
vision edge detectors. Or, even if ![]() is not a perfect indicator
of ``position relative to boundary'', the sign change in
is not a perfect indicator
of ``position relative to boundary'', the sign change in ![]() around
its zero-crossing affords us some control over whether we want to
emphasize regions closer to or further from the object's interior.
around
its zero-crossing affords us some control over whether we want to
emphasize regions closer to or further from the object's interior.
In the case of poor data, there are some adjustments to the method
presented here which may yield better results. When the material
boundaries are far from ideal, the calculation of ![]() from
Equation 5.6 is apt to produce a poor results.
Evaluating Equation 5.9, we can see that
from
Equation 5.6 is apt to produce a poor results.
Evaluating Equation 5.9, we can see that ![]() appears as a scaling factor, so at worst, this will require the user
to experiment with different scalings in the domain of
appears as a scaling factor, so at worst, this will require the user
to experiment with different scalings in the domain of ![]() . Also,
the
. Also,
the ![]() and
and ![]() calculated from the histogram volume may be very
noisy. Some improvements have been noted from smoothing these
slightly. Results from these experiments, and from utilizing the
technique on a variety of datasets are presented in
Chapter 6.
calculated from the histogram volume may be very
noisy. Some improvements have been noted from smoothing these
slightly. Results from these experiments, and from utilizing the
technique on a variety of datasets are presented in
Chapter 6.